Pages

Monday, February 8, 2010

Pattern Challenge and Double Layer Twirly Skirt


To keep myself on track for sewing this season I joined a pattern challenge at Come and See the Seitz. Here are the goals I've laid at for myself:
  1. finish the jumper planned for Glory.
  2. make matching skirts for the girls.
  3. make a Sunday dress for each of the girls.
  4. repurpose 2 shirts for Caleb.
  5. make a tie for each special Sunday for Caleb. (Easter, birthday, etc.)
  6. finish the planned shirt and skirt for myself.
  7. And to do this all before Summer.
Ok now I can keep going on and on here but I better stop. There are so many other things I have on my mind to make but one of the things that Sarah states is to make these attainable. So I can't put too many things on this list or else I'd never get them all done.

One of the things that I wanted for this list was this Double Layer Twirly Skirt but I finished it before I was able to post about the pattern Challenge. I made this skirt sans pattern and I'm happy with how it turned out for the most part. I made the waistband too wide so I'll be fixing that later. I like how my gathers turned out. (I don't like gathering!)

I don't claim to be the genius who designed this skirt. I saw the Modkid Julia pattern pics by Patty Young and thought it was so cute but too impatient to wait to order a copy so I thought I'd try it out on my own. It's not exactly like the Julia skirt (remember, no pattern) but what do you think of it anyway?

Wednesday, February 3, 2010

A Project A Day

I've had a very productive week! And it isn't even over yet!!

On Monday I was finally (after being absent for quite a few months) able to visit the sewing class I love to attend. I took 2 different projects with me to work on but of course I had to browse the fabrics at the quilt shop the class is held at and came away with this project instead:


I finished almost the whole thing during the class and all I needed to purchase was 1 charm pack and 1/2 yard of backing. It now sits on our kitchen table. All that's left to do on it is to quilt it but I want to get some variegated (sp?) thread for that.

To continue on the fabric shopping spree I bought some pretty fabric from an online shop last night to make a skirt for my oldest. She's growing so fast and I've only made her 1 skirt and she's about out of it now so I thought it was time for another. However, waiting for the fabric to come in to make the skirt is another thing completely. Since I got the idea in my head I was itching to get started so I pulled out some beautiful fabric that I had gotten on sale last year. It was already washed and ready to go.

I didn't want to mess with ruffles and tons and tons of fabric that some of the twirly skirts call for plus she's getting older and she's so tall that I'm not keen on that style for her. So I went with a simple A-line. Used my Sew What Skirts book and made myself a pattern for her.

I thought it needed something extra though so I added some pretty bead trim that I got at Walmart on sale.


My only mistake was my bottom tier. I wanted it to be 4 inches but I forgot to factor in taking away for the hem. So instead of the 1" hem I wanted I had to make it a 3/8" hem so that my bottom tier wouldn't completely disappear. Other than that I love how it turned out. I can't wait to see it on her!

Next I want to make a red tutu with rose petals inside for a little girl's birthday present this Saturday.

Tuesday, January 26, 2010

Quilting Spree

It's been a while since I posted last but then it's been a very busy winter. I didn't stop my sewing activity though. There were some weeks of inactivity but I've been able to complete some projects that I just love.

At the end of last year I was able to purchase a tie pattern that is super easy to make and so cute. I've made 2 ties so far for my little guy one for Thanksgiving and another for Christmas.


And speaking of Christmas, one of my gifts was a walking foot! I used it to finish quilting my Petit Fours table runner! I love how it turned out! I specifically made it for the dining table but it ended up looking great on my piano so I guess I'll have to make another one for my table. lol


I loved how the table runner made the piano and items on it look so much better I decided I needed something for my coffee table. I found this mini in an All People Quilt magazine. It was very fun to make since it was my first time doing these kinds of quilt blocks, very labor intensive, lots of pressing and cutting. I made a lot of "design decisions" with this one but I love how it came out.
"A Little Star Struck"
Finally, last but definitely not least, I finished my first large quilt! This was the quilt I started to make in the quilting class I took in January of '09 to learn how to sew. At the end of last summer I finally took the top to my teacher for her to quilt. She got it back to me in no time and I finally got around to putting on the binding. I finished it last week just in time for the purpose I wanted it to be used for....Family Movie Night!!

Friday, October 30, 2009

Refashioned Tshirt Hoodie Dress

After reading the very neat blog Lil Blue Boo and all of her super cute ideas I wanted to make my very own tshirt hoodie dress. (Not for me of course for my 2y/o).

So I made a quick stop at a thrift store and found this really cute top for $1.50.


I knew that was the one! When I got it home I found a shirt with a hoodie that I knew fit my little girl and used it as my pattern for the top of the dress.


I know some people just cut out around but I like to use chalk but will probably stop doing so the more I do this.


(Insert pause for me running up and down the stairs to help with schooling)

I cut off the bottom of the shirt where my lines stopped then cut out the rest of the top, front and back. Sewed it right sides together and then moved on to the sleeves.

(Insert pause to run up the stairs and get 2 dinners started one for us and one for a family that just had twins!! They are sooo cute!)

Since it is now getting to be cooler weather I wanted long sleeves. So I found another top that had sleeves that fit her arm length. And used it to cut off the ends of sleeves off of a black long sleeved tshirt that I also found for $1.5o.


When it came time for me to attach the sleeves I had no idea what I was doing. I've never attached sleeves before. So I quickly ran upstairs to find how to attach sleeves. Thank you, Sew, Mama, Sew!

(Insert break for doing more meal prep and schooling help)

I ran back downstairs and lined up the sleeve and top right sides together, sewed, and....


WALLAH!!

A top with sleeves!


(Insert break to make some elbow macaroni here)

Now for the skirt part of the dress. I cut the bottom off of the black formerly long sleeved tshirt. It had some cute pockets already and wanted to utilize those because my little girl loves putting her hands in her pockets.

(Insert long break to finish dinner. Deliver to the said family. Get lost on the way to their house and go in a BIG circle. What should have taken 2 minutes now took 20. Ooo and Aaah over the oh so cute twin boy and girl. Come home and eat dinner with family. Then try and put together a super confusing puzzle with husband and oldest daughter until bed time. Get everyone to bed for some peace and quiet.)


I then gathered (I hate gathering never turns out like it should for me) and sewed the skirt onto the bottom of the top.


And to make the bottom not so dull I added a rose using this tutorial from Happy Together.
So easy to do and I think super cute!!


Finally it was time to make the hoodie.
I took out the top from the beginning and use it's hood as a pattern. I originally wanted the hood to be the blue striped material but didn't have enough of it for the stripes to match in direction so I went with the same black tshirt.

Sewed the back part of the hood together then made a hem for the front. And attached the hood to the dress and...


It is finished!!

(Realize it is now 2am and I need to go to bed)

And the next day...


Wednesday, October 28, 2009

It's the Most Wonderful Time of the Year

Yes, yes, yes...it is that time of year again. "Christmas?", you ask. No, Christmas shopping!! (and crafting and sewing and whatever else you may do).

After finding out that we will be seeing my in-laws earlier than expected I thought I'd better get to work on all those gift ideas floating around in my head.

Here is one of the gifts:


These blocks will be turned into pot holders. A pair of them will be tied with twine onto a jar filled with cookie mix whose lid will also be decorated with some cute fabric.

The blocks were made with a Charm Pack "Let It Snow" and I was going to hit the fabric store for some backing but then found the Christmas Candy piece in a box of fabric that was given to me. It doesn't match perfectly but it's cute. My only problem will be finding a binding to match both sides.

Any ideas?

What are you making for gifts this Christmas?

Tuesday, October 27, 2009

I am a Refashionista!! (sort of)

lol I love reading all those blogs that give you such great little tutorials and show you how they amazingly re-purposed or refashioned an old article of clothing into something super cute. So awhile back while doing some laundry I came across this dress that belonged to my 6y/o:


It was a very cute dress with one problem. Stains. After multiple tries at trying to remove the stains (front and back) with no luck I usually would have just thrown this dress away. (It's not nice to give away a dress with stains on it.)

But, "AHA!", I said to myself, "I can re-purpose this into a cute skirt for my 4y/o!!"

So about 3+ months later I finally took it upon myself to finish this project and WALLAH!! the finished product:


Every piece of this outfit was re-purposed from something else. The skirt and all pink trim from the dress and the leggings were made from an old black maternity t-shirt.

I used a pair of shorts as the pattern for the leggings. I wanted them fitted so I had my 4y/o put on the shorts then pinned them so they were fitted. Then I when I cut out the pattern I cut 1/2 inch from the pin instead of the edge of the shorts.

The crotch area is a little too long but I'm not worried cause it gives her room to grow. I'll just know better next time.

This will be perfect as the weather is starting to get cooler even in sunny California.

I am still planning on adding a reverse applique pink heart to the bottom right of the skirt. Hopefully it will get done tomorrow. Too tired to finish it up right now. =)

Thank you Make It and Love It for the tutorial on making girl's pants. It gave me the idea to make the leggings instead of just shorts.

Thanks for reading! Please let me know what you think!

Wednesday, October 21, 2009

I Love Surprises! - CarryAll Clutch

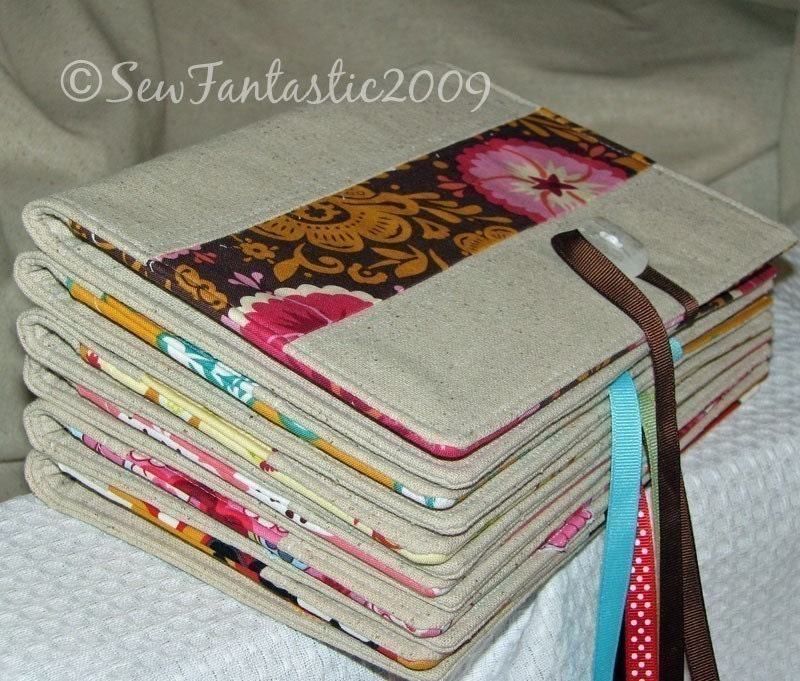
I love surprises! And when I found out that I won a contest at Joy's Hope I was excited! The prize was my choice of a Sketcher Wallet or Carryall Clutch from Terri of Sew Fantastic's etsy shop, GetSassed.

I chose the Carryall Clutch and not long after it arrived in the mail. It hasn't left my side since. ☺

This cute notebook is so handy! Plus it comes with a notepad and matching pen (mine also came with a cute little thank you note). The pockets hold so many items. I like to carry around some blank note cards for writing notes to people when it comes to mind, my Starbucks giftcard which my husband got me, and tracts from our Church. I also stash my receipts in the pockets and this has saved me from finding them wadded up in my purse.

I use the notepad for E-V-E-R-Y-T-H-H-I-N-G. From grocery and shopping lists to prayer requests or just something or some idea I want to remember.


My Carryall Clutch has the cutest little bird applique on the inside but some of them have different items depending on the pattern of the fabric she uses.

These Carryall Clutches come in many different super cute fabrics. It was very hard for me to pick the one I did.


Want one of these cuties for yourself? Terri is having a Mix and Match Sale where you can, I quote,
"BUY ANY ITEM IN THE SHOP AND GET ANOTHER AT HALF PRICE."
Perfect for Christmas which is just around the corner! Please visit her shop for more details if you are interested.

*The photos above are from the GetSassed Etsy shop. Used by permission.