Pages

Showing posts with label tutorial. Show all posts

Monday, January 10, 2011

Moody Blues Quilting Bee - January Block

moodybluesbee


FINALLY! I joined the Moody Blues Bee in October of last year but due to some slight problems I didn't get any blocks to work on until the end of last week.

When my Hunny brought me my package I didn't know what it was, until I opened it. Inside was a pretty robin's egg blue 9 inch square a long with some pretty gray strips of fabric. The instructions said we were going to be making an Asterisk Quilt Block. It looked simple enough and I had never made one before so I jumped right in the same day.

Since this was for someone else I didn't want to make as many "design decisions" that I usually do when putting together quilt blocks. I took my time trying to make sure every cut and every stitch was just right.

I'll be putting it in the mail today and hopefully Miss January will be as happy with it as I am!


Sunday, January 9, 2011

Mitered Corners and a Finished Quilt Top

In April of 2010 I attended a Quilt Show where I purchased a "Nap Time" Quilt Kit from the vendor The Calico Horse. I purchased it with my son in mind and because I loved the colors also I'm a sucker for striped fabric. =) I started said quilt kit right away and got a lot done on it too, rather quickly! However once I came to the borders I was brought to a halt. I had been sewing this at the sewing group I attend and my teacher was planning to teach me how to miter the border. She gave me enough instruction to piece the border strips together but then class ended and I never was able to take this particular quilt back to class.

The other day because of my New Year's Sewing Resolutions I decided to pull this one out and finish it up. Since it is still very hit and miss for me to attend my sewing group I decided to reach out to the online sewing/quilting community I have become a part of for help.

Amy of Amy's Creative Side came through! She makes the most beautiful quilts! She has a wonderful tutorial on her blog if you were ever wondering how to make Mitered Corners.


I am very proud of this corner!! See how the seams match up just beautifully! *Sigh* It makes me happy just to look at it.


With Amy's help I was able to finally put this quilt top on the finished pile! Now it's not a completed WIP until it gets quilted and it's binding put on. One of my favorite things about this kit was that the binding came with it! It will be the striped fabric that's in the border.


Another shot of the "Perfect Corner" (Yes I know I need to press it still)
What about the other corners you ask? Well, they are all just a smidge, an ever so very small smidge, off. After trying to redo 2 of them and coming up with the same results I decided to move on. It's not like my baby boy is gonna say, "Now wait a minute, Momma! These mitered corners don't match up!"


I would like to quilt this one myself. I think the fabric is way too busy for any type of free motion pattern. Any suggestions?

Thursday, September 9, 2010

Patchwork Cards and Quilting

I made some cards the other day using this tutorial from Pioneer Valley Girl.

They were very simple to make and they are great for gifts!

More patchwork cards


I also worked on the 1800's Vintage Quilt from the Moda Bake Shop. I'm using an American Primer Charm pack and you don't even need to cut every charm square. I might make some new potholders for my kitchen with the leftover charms and pieces.

1800's vintage doll quilt


I'm starting to think about Christmas gifts for the kids and since they definitely don't need anymore toys or clothing I'm going outside the norm. This year on the gift lists are personalized bath towels, Pretty pillowcases and pillows, and whatever else I can think of to make. lol I need to get started since I've got 4 of them to sew for! Trying to think of what to get my husband for Christmas as well. It's always so hard to shop for him. Any ideas?

Monday, August 16, 2010

90 Minute Shirt

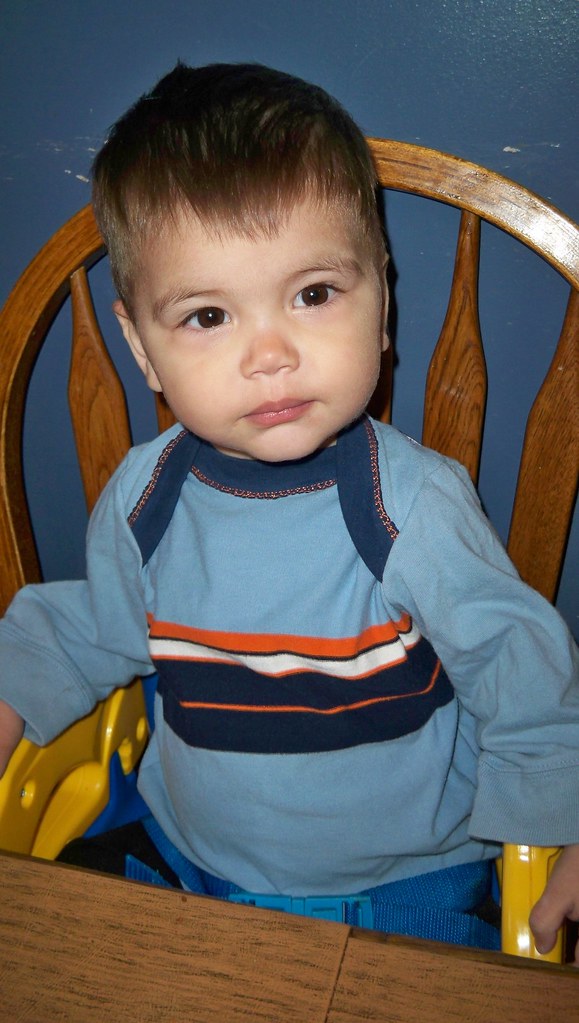
Made Caleb a 90 Minute Shirt last night. Since it was my first time it definitely didn't take 90 minutes but the next one will be faster. =) I used an old long sleeved tshirt I found at a garage sale. The binding is from another tshirt that was super soft.

I really liked how easy it was to make. My pattern needs a little tweaking though. The front neck is too high but it is still wearable.


Isn't he too cute! This is him just woken up. lol I couldn't wait to try it on him this morning. (And for the record I did not wake him up; he was already up.)

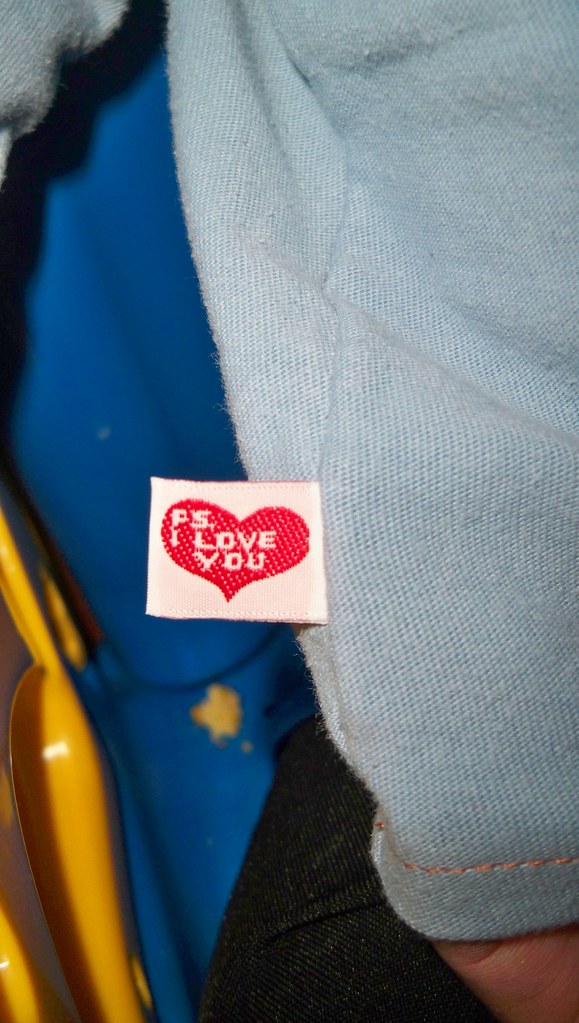
I was finally able to use my "P.S. I Love You" tags that I bought at the Quilt Show I went to in the Spring. I think it's too cute!

More of these shirts will definitely be popping up. They are so easy to make! (Did I mention that already?)

Friday, July 30, 2010

Comfy and Easy Skirts


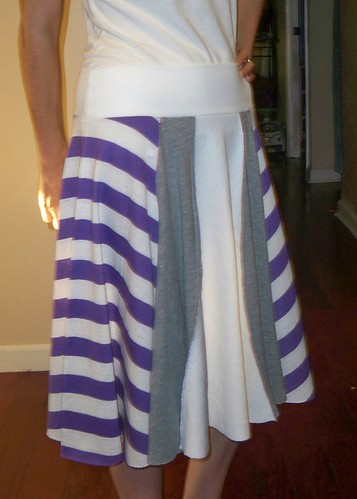
If you haven't made yourself a circle skirt yet I highly recommend it! After seeing how cute my daughter's skirts were I wanted one for myself. This morning I set about it and made myself my very own. It is sooooo comfortable and so easy to make. You don't even need to buy a pattern!! It's very easy to make yourself and here are 2 great links to tutorials on making them:

Rosie's Whimsy Circle Skirt Tutorial


Whitney Sews - Tshirt Resize and Tshirt Circle Skirt Video

I foresee many of these making it into my closet and many more trips to the thrift shop and garage sales for graphic tees.

Sunday, May 23, 2010

Happy 5th Birthday/My 1st Sienna Dress


It's finished! And it came out PERFECTLY!! Well, at least as perfect as I can tell before seeing it on her. But that will have to wait until morning it's after 11pm right now. Sorry for the bad lighting in the pics. I took many but these were the best two.

This was a very fun project and would have been quicker but I just had to complicate things. lol I used the Sienna Dress Pattern from Lil Blue Boo (as I said in my last post). I decided to go with the short sleeves and I had to add an inch on to the bottom, I like their dresses to last through a growth spurt.

I had a lot of fun using Lil Blue Boo's Freezer Paper Stenciling Tutorial (except I used Tulips Spray Fabric Paint, didn't have to mix my own) and trying out her Reverse Applique Tutorial as well! Then at the end my little birthday princess wanted ruffles on it so I decided to lettuce edge the hem and the sleeves. I can't wait to try it on her tomorrow! Good Night!

Friday, May 21, 2010

Making something special and close to my heart

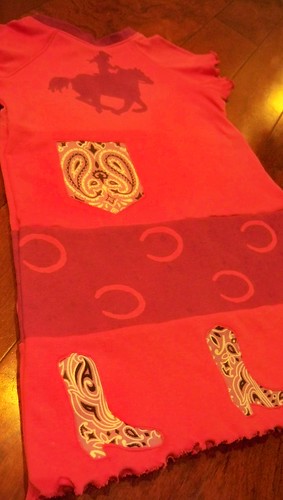
I'm working on something special in true "Jennifer fashion", at the last minute! Tuesday is my middle girl's 5th birthday and even though she is afraid of all animals big or small she thinks she is a cowgirl! For Christmas she wanted a cowgirl outfit, horse toys, etc. When she plays it usually will involve cowgirls or horses. So for her birthday I had the idea to make her a cowgirl themed dress.


I bought the Sienna Dress pattern a long time ago after reading Lil Blue Boo's blog. She is amazing and her stuff is so cute! So I thought this would be the perfect one to make this outfit with. Lil Blue Boo also gives great tutorials on freezer paper stenciling and embellishing your fabric which I will be doing to this dress.

The fabric is a load of pink knit fabric I scored at a garage sale for less than 50cents! (SWEET!) When I went to the craft store to get some paint and spray bottle (per Lil Blue Boo's instructions) I found that Tulip now makes spray fabric paint. Nice!

So I'm up to the point where I have all my pieces cut out. Now I'm embellishing each of my pieces. I've put a cowgirl on a running horse on the front and she didn't turn out too bad for my first try at stenciling. I probably should have practiced on a scrap piece first but I'm impatient and I'm on a time crunch. =) Now that she is dry I've found that the Tulip paint will make your fabric a little hard but I'm waiting to see if it'll soften when washed.


Next is to add special things to the bottom three layers of the dress. I'm thinking on the first layer a large star with a 5 in it with smaller stars, second layer horseshoe prints, last layer either boots or vertical stripes. I was thinking of putting Cowgirl Madison somewhere on the dress but have heard you shouldn't put your kids name on things like that for safety. What do you think?


(Oh and getting back to the "close to my heart" in the title, I love horses. Don't own one, yet! But it's the main decoration in my house. lol)

Friday, April 16, 2010

It's Friday Already?!

Yes it is and I haven't gotten one single thing done on any of my projects. Yuck!!

I've been a bit under the weather due to allergies and by the time the kids get in bed (my sewing time came around) I was so tired that I just got in bed as well. I have gotten some things done. I moved my sewing area out into the garage. It makes for a much cleaner bedroom and I don't have to worry about keeping my husband up when I sew late.

All my projects are at the cutting stage and I think that's also why I've not started any. I hate cutting but it is needed if you want to actually sew something.

Pray for us this weekend as we are having a special Ladies & Girls Spring Event for the ladies and girls of our church. We have a special speaker (one of our missionary wives), food, and a lot of fun planned. (This has also kept me very busy this week.)

I had a wonderful birthday and received many lovely cards and gifts inside the cards (WOOHOO fabric store here I come!) but with all the busyness haven't yet sent out (or purchased) my thank you cards. I think I'll try making them using this blog post as inspiration:

Bernina: Make a Greeting Card on Your Sewing Machine.

And did any of you see this oh so cute tutorial?
Mother Huddle: Hanging Fabric Baskets
I can think of a few places where these would be handy!

Sunday, March 14, 2010

Phoebe Bag with Pants-style Front Pockets

Phoebe Bag with Pants-Style Front PocketsTA DA!

The Phoebe Bag (pattern from Rebekah of Artsy-Crafty Babe).

This bag is so cute if I do say so myself!! The pattern was very easy to follow and would not have taken long however....

Inside
....I have been seeing some very cute bags people have been making online with pants-style front pockets. I very much wanted to make my very own bag with those pockets! After searching and searching and searching and asking about how to make pants-style pockets on a purse and coming up empty. =( (Oh there were a couple of really cute patterns for sale that showed you how to do it but that takes $$$) I decided to strike out on my own and figure out how to do it myself.

As you can see I figured it out! It wasn't hard just very time consuming. There were so many pieces of fabric to cut out. Plus I wanted the bag to hold it's shape so there was also interfacing and thin batting to cut out.

AND to top it all off I wanted all the fabric pieces to line up. Both fabrics have the same design just different colors and I wanted it all to match up. Even the bag flap matches up.

Everything lines up so pretty!
There are only 2 things I would change on this bag. I would be more careful of my magnetic snap placement (it's a little too low so the bag can't be closed while brimming with stuff). And I would make the pants-style pockets a little bigger. The pockets just fit my hand going in but if you had a bigger hand you wouldn't be able to reach in.

The pattern called for a matching fabric strap that you make yourself. Since almost all purses you make yourself have those kind of straps I wanted something different. I found my cute silver link belt that I really don't wear much or at all and attached it to D rings on the purse. I can take it on or off. So if I wanted I could still make a fabric strap and add snaps to make the fabric strap removable as well so I can change the strap according to how I'm feeling that day. =)

I <3 Blue!
I had a lot of fun making this bag! Let me know what you think of it.
Since I couldn't find a "how-to" for the Pants-style pockets I may post a tutorial in the future depending on interest. Let me know. =) Have a great day!! Go make something!

Thursday, March 11, 2010

Join in the fun!


I'm having fun since I joined in on the Pillowcase Crochet Along hosted by Cassie at You Go, Girl!

I finally was able to get my supplies (most of them anyway) today and start on this project. I already had the fabric, appropriately from Pillow and Maxfield for Michael Miller.

This isn't the finished product of course but I am looking forward to giving it a test drive tonight. =)

Looking forward to getting to next week's step. Adding the crochet trim.

Wednesday, March 10, 2010

A Finished Gift

I wanted to make a journal cover as a gift for a friend of mine and found a very simple tutorial on Bloom. I wanted to make it more personal so I added some embroidery.

I love how the whole thing turned out! I want to make one for myself. Soon.


I thought this font was perfect for her beautiful name!


This journal was going to be used in our discipleship meetings so I wanted a verse just for her on it and my husband thought of Romans 15:4.


I added a pocket for the pen, a ribbon for a page holder, and elastic to hold it closed when carrying it around.


I added fabric to this pen to make a matching set.

Sunday, February 21, 2010

Embroidery and Gifts

I started working on a journal cover Thursday night using this tutorial from Bloom. I found it using Google and I'm glad I did. She has some great follow up posts for the tutorial with some cute ideas. I had to tweak it a little to fit the notebook I bought but it's working so far. =) I would love to share pics but I can't yet because it is a gift and even though I believe the intendee doesn't read this blog I don't want to take a chance.

I'm keeping roughly to the same design that Bloom uses but I'm spicing it up with some embroidery. I've put the intendee's first name on the front and I'll be putting a Scripture verse my husband thought would be good for this person on the inside back cover.

It took me quite a while to get the verse laid out just like I wanted it but I like it. And while you're scratching your head wondering if I've lost it our something I just want to say, "Yes, I know it's backwards." lol I don't have the proper tracing tools for embroidery so I used a light pen and traced it on the backside of the project. After finishing the embroidery I just need to add a pocket on the inside front for a pen then finish the last steps in sewing it up.

I can't wait until it's finished! After I'm done I'll be making one for myself (sans embroidery, maybe).

Friday, October 30, 2009

Refashioned Tshirt Hoodie Dress

After reading the very neat blog Lil Blue Boo and all of her super cute ideas I wanted to make my very own tshirt hoodie dress. (Not for me of course for my 2y/o).

So I made a quick stop at a thrift store and found this really cute top for $1.50.


I knew that was the one! When I got it home I found a shirt with a hoodie that I knew fit my little girl and used it as my pattern for the top of the dress.


I know some people just cut out around but I like to use chalk but will probably stop doing so the more I do this.


(Insert pause for me running up and down the stairs to help with schooling)

I cut off the bottom of the shirt where my lines stopped then cut out the rest of the top, front and back. Sewed it right sides together and then moved on to the sleeves.

(Insert pause to run up the stairs and get 2 dinners started one for us and one for a family that just had twins!! They are sooo cute!)

Since it is now getting to be cooler weather I wanted long sleeves. So I found another top that had sleeves that fit her arm length. And used it to cut off the ends of sleeves off of a black long sleeved tshirt that I also found for $1.5o.


When it came time for me to attach the sleeves I had no idea what I was doing. I've never attached sleeves before. So I quickly ran upstairs to find how to attach sleeves. Thank you, Sew, Mama, Sew!

(Insert break for doing more meal prep and schooling help)

I ran back downstairs and lined up the sleeve and top right sides together, sewed, and....


WALLAH!!

A top with sleeves!


(Insert break to make some elbow macaroni here)

Now for the skirt part of the dress. I cut the bottom off of the black formerly long sleeved tshirt. It had some cute pockets already and wanted to utilize those because my little girl loves putting her hands in her pockets.

(Insert long break to finish dinner. Deliver to the said family. Get lost on the way to their house and go in a BIG circle. What should have taken 2 minutes now took 20. Ooo and Aaah over the oh so cute twin boy and girl. Come home and eat dinner with family. Then try and put together a super confusing puzzle with husband and oldest daughter until bed time. Get everyone to bed for some peace and quiet.)


I then gathered (I hate gathering never turns out like it should for me) and sewed the skirt onto the bottom of the top.


And to make the bottom not so dull I added a rose using this tutorial from Happy Together.
So easy to do and I think super cute!!


Finally it was time to make the hoodie.
I took out the top from the beginning and use it's hood as a pattern. I originally wanted the hood to be the blue striped material but didn't have enough of it for the stripes to match in direction so I went with the same black tshirt.

Sewed the back part of the hood together then made a hem for the front. And attached the hood to the dress and...


It is finished!!

(Realize it is now 2am and I need to go to bed)

And the next day...


Tuesday, October 27, 2009

I am a Refashionista!! (sort of)

lol I love reading all those blogs that give you such great little tutorials and show you how they amazingly re-purposed or refashioned an old article of clothing into something super cute. So awhile back while doing some laundry I came across this dress that belonged to my 6y/o:


It was a very cute dress with one problem. Stains. After multiple tries at trying to remove the stains (front and back) with no luck I usually would have just thrown this dress away. (It's not nice to give away a dress with stains on it.)

But, "AHA!", I said to myself, "I can re-purpose this into a cute skirt for my 4y/o!!"

So about 3+ months later I finally took it upon myself to finish this project and WALLAH!! the finished product:


Every piece of this outfit was re-purposed from something else. The skirt and all pink trim from the dress and the leggings were made from an old black maternity t-shirt.

I used a pair of shorts as the pattern for the leggings. I wanted them fitted so I had my 4y/o put on the shorts then pinned them so they were fitted. Then I when I cut out the pattern I cut 1/2 inch from the pin instead of the edge of the shorts.

The crotch area is a little too long but I'm not worried cause it gives her room to grow. I'll just know better next time.

This will be perfect as the weather is starting to get cooler even in sunny California.

I am still planning on adding a reverse applique pink heart to the bottom right of the skirt. Hopefully it will get done tomorrow. Too tired to finish it up right now. =)

Thank you Make It and Love It for the tutorial on making girl's pants. It gave me the idea to make the leggings instead of just shorts.

Thanks for reading! Please let me know what you think!

Thursday, September 24, 2009

Sewing in the Rough (and some Baby Shower Gifts!)

I finally blew the dust off of my machine and got to work. With a baby shower only 1 day away I needed to get cracking! My goal was to have a matching Nursing cover, 2 spit up cloths (one for each baby, she's having twins!!), and a diaper clutch ready by tonight. Well, I got 2 out of 3 done. The nursing cover and the spit up cloths. I had enough material to do the diaper clutch just not enough time.

I still didn't get my sewing area cleaned up I just worked around, on, and through it. I finally braved up and will show you a pic of what I worked through.


Everything I need an arm's length away! You just have to dig for it. lol My stash of mini-Snickers I think are the most important thing on this table. I learned this from Cassie at You Go Girl! just read her Pencil Roll Tutorial and No Snit Binding Tutorial and you'll see why.

No really, I don't like working with my table like this. Usually I would have cleaned it all off before starting but there was no time.

So now to the sewing! I finished up the nursing cover in good time. I still have one more to make for a friend of mine.


She loved the colors! YAY! I always try to ask about favorite colors and since her wedding colors were red and green (in July not a Christmas wedding) I thought she would like this fabric. Carnival Bloom by Michael Miller.

This time I added pockets on the inside bottom corners of the cover. I wanted to use a knit fabric but there were no white knit remnants at the fabric store so I re-purposed a onesie that Glory had outgrown.


I then moved on to the spit up cloths. I got my inspiration from this one:


It was a gift given to my sister-in-law's sister from her Sunday School class. The snag was that the lady who made them has a machine that does embroidery, hence the lovely lettering.

I do not.

When an amateur seamstress tries to copy above artwork on her own machine, freehand you get this:


Not Pretty.

I had already sewn on the fabric onto the bottom so after wasting time doing the above work I had to pull out Mr. Seam Ripper to take off the fabric and add it to another cloth.


See all the thread still hanging onto the ruined cloth.

Then I decided to use my lettering that my machine can do but thinking I had to enter in the letters a certain way I came up with this:


Luckily, I used a scrap piece of fabric to see how it would come out instead of wasting another cloth.

After correcting my mistakes my finished product finally came to this:


I really like how they turned out and I loved how everything matched!!

I usually don't give cards at baby showers. Since I'm right there when they open it I can let them know it's from me! =) But I thought I'd use a piece of scrap fabric to make a matching card as well.


Too pretty to wrap up! This fabric is awesome!

The diaper clutch never made it even to the cutting board but since I have enough fabric for it I'll still be finishing it up and getting it to the Mommy to be.

It has been awhile since I was sewing last and I really enjoyed getting back to it. The Lord has really blessed me with a wonderful way to create lovely things for my friends and family (and for myself ☺).